Wednesday, May 25, 2011

Springtime in Paris Card Set

Through a black and white lens

Don’t you just love it when you plan something and it just comes together naturally without a lot of rework?   Oops...did I type that?  I know you all thought I was perfect, right!  LOL! 

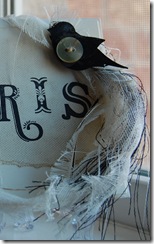
My inspiration for this set of cards was a grouping of blocks that had “Paris” painted on them.  Gift PackageI decided to use the bird cage to change up the words a little bit.  The bird cage from the Nature Walk set was a logical choice as the cage was thin-lined and would show the “A” through it!  I haven’t done too much overstamping except when using background stamps…but, I like it!
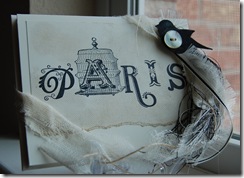
The background is a retired favorite of mine the Linen background stamp.  I let my fingers do the walking on the back to allow for an uneven image to appear with the Crumb Cake ink.  A little tear and some sponging finished up this All Occasion card set. 

To package a set of four cards and envies up, I Bird of PARIS decided that I needed a bird to complete the set. I used a fabric strip, some frayed ribbon and a piece of linen thread to extend the bird’s tail. I really think the extra plumage attracts the eye to these simple cards. Only a Paris bird would have so much going on, right? What do you think?
Stamps:  Broadsheet Alphabet, Nature Walk(Occasions Mini- Retired?) , Linen (Retired) 
Papers:   Very Vanilla, Basic Black
Ink:  Jet Black Stazon, Very Vanilla Craft Ink 
Accessories: Button, Linen Thread, 1-1/4” Striped Grosgrain Basic Black, fabric strip,
Tools: Two Step Bird Punch, Stamp-a-ma-jig, Clear Blocks for Alpha stamping, sponge
Techniques Used: Frayed Ribbon, Tearing, Sponging

Thanks for stopping by!  Enjoy! 

Stampin' Up! products can be purchased through me.  Email me for more information!


Tip:  Using a clear mount alpha set is a dream when creating words.  I lined up the letters on the “I” block and stamped 20 panels in minutes!

Tuesday, May 24, 2011

Secret Messages

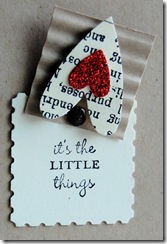
Close Up Remember when we were kids and how you loved getting a note from your friend…you slyly opened it during class hoping no one would see the precious words that were written for you alone?  Did you just relive one of those awesome moments from grade school?  Memories are wonderful things! *smile* 
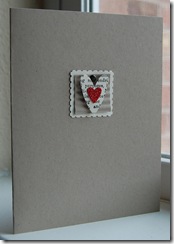
My newest creation took me back to those years!  This quick little card has a surprise greeting for the recipient.  Who doesn’t like surprises, right? 
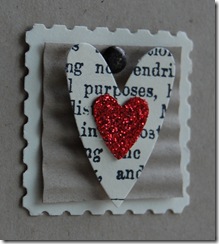
Secret Message Card This card was quick to create as I used Stampin’ Up! newest punch the postage stamp punch and  the tried and true Heart to Heart punch!  I just love the cute postage stamp and have used it on several of my current creations.  It is about 1-1/4” square and has the lovely stamp detail!

Secret Messages Reveal The secret message is revealed by moving the top portion of the image.  The brad is the only thing holding it on…so it will move to reveal that special message only for your special recipient.  Don’t forget to let them know in your personal message that there is a special message on the front!  I stamped my message, but a personal handwritten message would be perfect too!

I know I have been using a bunch of retired product lately…but I have to use it up so bear with me if you have already used yours up! Months of no stamping does that to you!

Stamps:  Your’e a Gem (Retired)  
Papers:   Crumb Cake, Very Vanilla, First Edition DSP(Retired), Red Glimmer Paper (Retired)
Ink:  Jet Black Stazon,
Accessories: Dimensionals, Gold Brad, Black Permanent Marker(to color gold brad) 
Tools: 1/16” Handheld punch, Heart to Heart Punch, Postage Stamp Punch*, Crimper, Paper Snips
Techniques Used:  Secret Message Card

Next time you create a card, try making a secret message card and give your friend a little surprise!

Thanks for visiting! Enjoy!

Get your Postage Stamp Punch from me today! 

*Postage stamp punches are available now from the Stampin’ Up! Summer Mini Catalog!

Wednesday, May 18, 2011

The All Occasion Card

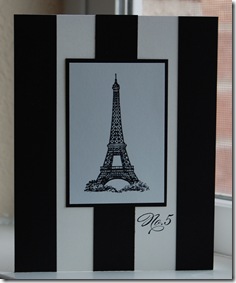
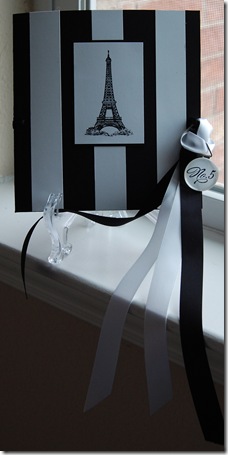
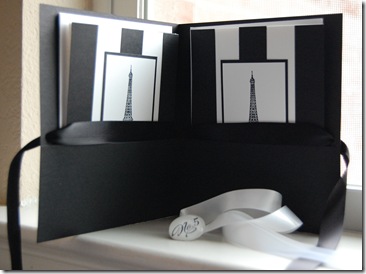
Gift Folder So what have I been doing these last few weeks?  Not stamping that was for sure!  I had family and friends from out of town visiting and then a quick trip to Chicago was in order.  This past weekend I was in Waxahachie, TX at the cutest little Bed and Breakfast. If you ever are down in that area with your friends or your honey let me know and I’ll get you the information!  It was just charming!  It accommodated us four gals just perfectly!Opened Gift FolderI actually had a few minutes to begin designing these cards in Waxahachie, but only today did I have the chance to put it all together!  I love giving the gift of cards for birthdays, parties, or any other special event.  I usually like to give cards that can be used for any occasion because the recipient will use the cards that I have made for them.  If you give a set of various occasions then the possibility exists that the cards may be haunting a drawer for some time until the specific need arises. 

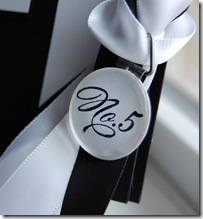
Close Up of ClosureThis gift set contains 4 simple cards and envelopes.  I’ve made this fun matching file folder gift packaging to hold them.  I love this long ribboned closure!  So elegant! The packaging becomes a beautiful conversation piece if left out in the open. The ribbon can be used as a necklace with the “No. 5” charm. And after the cards are used, the owner can add some dried mix packets, seed packets, etc. and regift the packaging.  I think I may have said this  4 Cards and Envelopesbefore, but I love making things that can be reused!

Please tell me…what do you think of the stripes?  I actually got the inspiration after seeing a card made with striped paper.  It was easy to create the stripes with what I had on hand and a sharp paper cutter. Scrap paper strips were handy to have for this project!

Stamps:   Clearly for You (2011 Occasions Mini), Artistic Etchings 
Papers:   Basic Black, Whisper White
Ink:  Jet Black Stazon,
Accessories: Glass Fragment,  Hodgepodge Hardware (retired) 
Tools: 1” Circle Punch, Paper Cutter, Crystal Effects
Techniques Used:  Stripes

Finished size of gift folder is 5-1/2” x 6”.

Thanks for stopping by!  Enjoy!

Place Your Stampin' Up Order with Me!