Sunday, February 27, 2011

On a Butterfly’s Wing

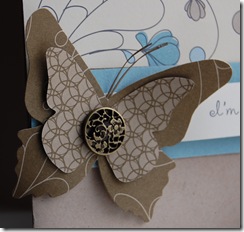
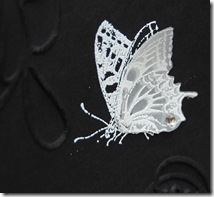
FEB11VSNK close up Vellum is one of those papers that can instantly create softness when used on a project.  Did you hear me say that in a whisper? That is what I think of when I think of vellum…it is as delicate as a whisper or a butterfly’s wing. 

Now I’ve been dying to break open my new Nature Walk stamp set that I received for my So Shelli New Year Creative Challenge entry.  It is one of those FEB11VSNK close up 2 sets that instantly came to mind as I would be embossing on vellum.  Whether you decide to heat emboss or dry emboss, vellum is a delicate paper so be cautious so as not to tear or burn…unless of course that is your desired effect! 
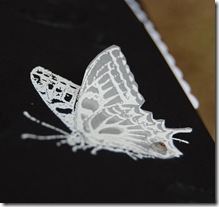
This card took not but 10 minutes to create after I rounded up all my supplies.  Clarification: The butterfly was stamped once on the card base and once on the vellum and embossed with Whisper White Craft ink and Stampin’ UP!’s White Detail embossing powder. Next, the card itself was embossed in the Big Shot using the Elegant FEB11VSNKLines embossing folder.  After cutting out the top wing and adhering a beautiful tiny jewel on it, I used a mini glue dot to adhere to the card. And Voila, the wing just naturally curled out…I love it when a plan comes together! If you miss the sparkle of that little jewel in the photo, just close your eyes and picture it! It is just downright sparkling isn’t it? *smile*

Hint:  Get some idea of where that butterfly will fit in relation to the embossing design before you stamp it,  or dry emboss the base card before stamping and heat embossing.  Of course, if we don’t make mistakes you don’t come up with creative ideas to fix them, right?  Can you guess what my creative fix was?  Did you even know that I had to come up with a creative fix?

Stamps:   Nature Walk
Papers:   Basic Black, Vellum, Whisper White 
Ink:  Whisper White Craft
Accessories: Elegant Lines Embossing Folder, White Detail Embossing Powder, Rhinestone Jewel, Mini Glue Dot,
Tools: Paper Snips, Heat Gun, Big Shot, Embossing Buddy, Dotted Scallop Ribbon Border Punch 
Techniques Used:  Heat Embossing

Enjoy!

http://lindakeal.stampinup.net


The Nature Walk Stamp set in Wood Block (121925) or Clear Block (121997) is available until April 30.  When placing your order, don’t forget to add quality Stampin’ Up! Vellum Paper(101839) too!

Tuesday, February 22, 2011

Laundry Bliss

Clothes Pin Gift I know that these two words shouldn’t be in the same sentence, let alone in a title all by themselves, but alas, I like to shake things up every now and again! *smile* Monday was/is always laundry day…I know…I schedule this weekly event on the first day after the weekend…what was I thinking?!  You know I’ve come to dread the Monday morning routine…I wouldn’t doubt there are a lot of you out there that would rather be stamping/creating rather than doing laundry.  And that, my friends, is how this project all came about. 

These are not your Grandma’s clothespins!  I remember the days, when my Mom and Grandma used to hang the sheets out to dry and the fresh smell of spring would permeate the fibers.  I loved sleeping on those sheets.  I also remember her giving us some of her clothespins to play with.  Magic markers and crayons were our tools of choice.  Years later, I found her bag of clothespins in the garage with our beautiful creations in them.  I’m sure she smiled when she hung her clothes to dry with those special clothespins.

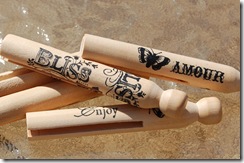
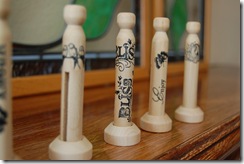
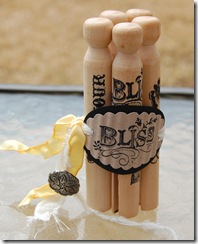
Handstamped ClothespinsSo how to make laundry fun?…stamp on your clothespins with your favorite Stampin’ Up! stamp set!  I combined two of my newest favorite sets, Bliss and Clearly For You, to create my Chic clothespins.  I may have to put up a clothesline just so I can smile while hanging my sheets to dry! 

I also thought these would look so cute holding up some pennants using Stampin’ UP!’s Big Shot Pennant die on a muslin string in our laundry room, spelling out L-A-U-N-D-R-Y.  I think that would make me happy every time I walked in there! Unfortunately, I ran out of clothespins so I’ll leave that project for another day! 

Stamps:   Bliss, Clearly for You
Papers:   Basic Black, Crumb Cake
Ink:  Jet Black Stazon,
Accessories: Daffodil Delight Ribbon, Scalloped Oval Punch, Antique Brad, Muslin Fabric Strip, Mini Glue Dots
Tools: Crop-a-dile, Heat Gun, Crimper
Techniques Used:  Heated Ribbon

Clothes Pin DecorHow did I do that?  Ink up your stamp and lay on the table, ink side up. Ensure that you have no ink run off on the side edges of the stamp…you’ll not want any edges appearing on your inked image.  Take your clothespin and roll it on the stamp. Make sure to use some pressure on the clothespin as you roll it.  If you use words make sure that they are in the right direction before stamping…you’ll not want any upside down words.  Can you guess why I am out of clothespins yet?

UPDATE 3/8/11:  There were a couple of comments about the stands in the photo above.  I received those with the clothespins.  They were called clothespin stands. They may also be called wooden doll stands.  HTH.

Enjoy!

Visit My Online Store


*Use these clothespins to cut down on your energy bill so you can buy more stamps! Is anybody reading this stuff?

Saturday, February 19, 2011

What inspires you to stamp?

When I’m up at 2:00 AM, I bring out the iPad and  Certainly Celery, Whisper White and Sahara Sandstart scanning the websites that I frequent.  2-1/2 hours later my head is swimming with ideas.  My Stampin’ UP! Catalog and Butterfly notebook are on my lap so I can flip through to find that stamp set I want or sketch out an idea…I don’t have to get up…the height of laziness I know…but it is 2:00 AM and I don’t want to get up!  This is what came to me this morning.  The Certainly Celery is more brilliant in real life…I just had trouble catching that beautiful color in my photo today.

Reflective Pom Pom

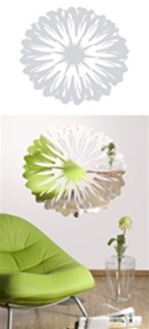
These simple cards were inspired by some Reflective Wall Art that I found online.  I looked through practically the whole site looking for that one item that inspired me and this was it!  I’m a lover of the color green so this just caught my eye!    I opened up my catalog found the Greenhouse Garden set and knew it was the perfect set for my project.  If any of you still have the Looks Like Spring retired Stampin’ UP! set, I think that would also be a great set to use for this project. If I can find mine that is packed away…I’ll give it try too.

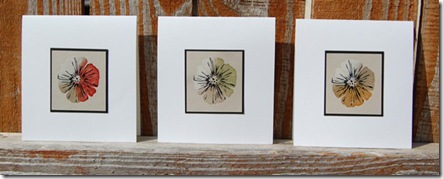
My first 4-1/4” x 4-1/4” creation used the same colors as the inspiration piece – Certainly Celery, Whisper White and Sahara Sand.  I have to say that I was definitely intrigued by embossing on the sahara sand – you get a different look than embossing on the standard white or vanilla cardstock.  I loved how it turned out so I moved on by exchanging the Certainly Celery with Poppy Parade and then with Peach Parfait.  Do you have a favorite? Inspiration Trio All of the cards are embossed with clear embossing powder.  I love the variety in the cards and I believe that they are a terrific card set.  Thinking….thinking….now how do I package them up!  ***I think that will be a post for another day!***

UPDATE:  How did I do that?  This is an easy ink-layering technique, it is just time consuming because you need to clean your stamp between each card.  First, I stamped the solid image in Versamark.  Next, I used two sponges and sponged two colors onto the stamp (Certainly Celery, Whisper White (Craft)).  You should do this delicately with the standard Dye style inks so as not to remove all the Versamark in the process. The Versamark allows you to emboss the image.  Most dye-inks dry too quickly to emboss.  I did not sponge on the Sahara Sand as that color would just come through naturally using the Versamark with the Clear Embossing Powder.  If you have all Craft style inks you can omit the Versamark.  Next, I used my Stamp-a-ma-jig to stamp the detail with Jet Black Stazon and then clear embossed the entire image.  There will be some speckling of the embossed image on the dye inks if you pulled off too much of the Versamark…but in no way does this detract from the beauty of the embossed image! Cleaning your solid image stamp between cards eliminates transfer of different inks into your white and Versamark pads. 

Stamps:   Greenhouse Garden
Papers:  Whisper White, Basic Black, Sahara Sand
Ink: Versamark, Jet Black Stazon, Whisper White Craft Ink, (Poppy Parade, Certainly Celery, Peach Parfait as pictured in above photo)Accessories: Clear Embossing Powder, Embossing Buddy 
Tools: Sponges, Heat Gun, Embossing Buddy, Stamp-a-ma-jig
Techniques Used:  Heat Embossing, Two-Step Stamping, Ink Layering

Enjoy!

Happy Stamping!

Thursday, February 17, 2011

Stamping in Silhouette

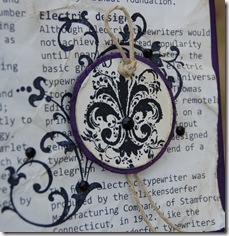
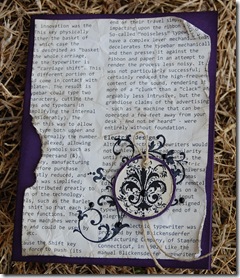
Silhouette Birthday Close Up Creating cards for a specific person and reason is so satisfying.  Today, I was having lunch with one of my newest friends and sorority sisters, Tammy.  Her birthday is tomorrow and I needed to get a card made quickly.  I never seem to complete cards ahead of time….I wonder if anyone else is like that too or if you have a stockpile of cards that you have ready.  Where do you look for inspiration when you begin creating?  I love looking through the daily challenges at Splitcoast because they give me a good starting point for my creations.  The challenge today was to stamp using silhouette images or to make your own.  I made sure to incorporate some of Tammy’s favorites too…the color purple and a fleur de lis in her card creation.Silhouette Birthday I love that Stampin’ UP! makes it easy by offering their beautiful papers in such a lovely array of colors!

I love making cards that have a 3D element in them, especially if I plan to hand deliver them.  It is typically one of the unique characteristics of a handmade card and what usually makes it unique in an of itself!

This was a relatively simple card to create with the use of the punched main image and Designer Series Paper.  Easy to create and easy to recreate!

Stamps:   Elements of Style, Extreme Elements
Papers:  Elegant Eggplant, First Edition Designer Series Paper, Very Vanilla
Ink: Jet Black Stazon, Elegant Eggplant and Crumb Cake
Accessories: Hemp Twine, Dimensionals, Black Rhinestones (SU Retired)
Tools: 1-1/4” Circle Punch, 1-3/8” Punch,1/8” Handheld Punch 
Techniques Used:  Distressing

Enjoy!

Extreme Elements is one of those must have sets!  Contact me to order yours today!


Sale-a-bration is underway!  Order your Extreme Elements Stamp set today and earn free products with a qualifying order.  Call or email me now with any questions or to place your order.

Tuesday, February 15, 2011

Coffee or Tea for Two

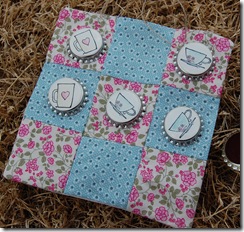
This is a cute little project that I came up with last night.  It  Game Boarduses Stampin’ Up!’s beautiful Designer fabric and images along with some items that you may have around your house – bottle caps.  My bottle caps were newly acquired, but this project is perfect if you want to repurpose some of those that you may have collected and saved. I had been collecting these little pieces of “canvas” or bottle caps, for a long time and when we moved I finally decided that they would end up in the recycling bin.  *sigh*  But, as luck would have it, a friend sent me these bottle cap beauties to play with!

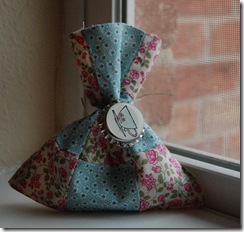
Packaged  Game SetThis little set includes a fabric tic tac toe game board that  doubles as a little storage bag to hold the game pieces.  One of the game pieces also doubles as the bag tie to keep the pieces inside.  I punched a small hole using a handheld punch and inserted some linen thread through the bottle cap.  The piece comes off completely and can be used as the final piece when playing. 

If you want to make your own little game board, cut nine 2-1/2” x 2-1/2” squares of coordinating fabric (5 squares in one of the colors and 4 in the other).  All seams are 1/4”.  The back of my game board is a 6-1/2 square of muslin, but you could use one of your coordinating fabrics.  I figured the muslin would show my name and copyright stamp easier! (see pages 144-145 of the current catalog for these customized stamps)   If I was more awake when I was making the bag, I would have made a drawstring tie, but I just tied the linen thread with the attached bottle cap to keep the game pieces inside. Easy Peasy!

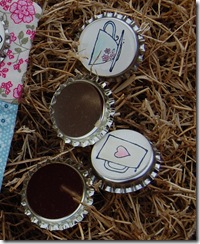
Game Pieces You’ll need nine bottle caps for this game set. The 1” punch fits PERFECTLY on the bottle cap.  Decide on two different images.  For me this was the hardest part, choosing which stamps to use.  Stamp 5 of one image and 4 of the other.  That made me super happy!  **happy dance** Snail Adhesive worked great to keep the paper attached to bottle cap.  This may work differently based on how much humidity you have where you live so test out some of the other Stampin’ Up! adhesives if you are not getting the same results. I placed the self-adhesive covers on top of the watercolored images and I was done.

I really thought this project would be great for a party favor maybe at a Tea or a Shower.  But honestly it would be great as an anytime sugarless gift for a teacher, neighbor friend or loved one!  Don’t you think this would be a fun sugarless Halloween treat with spiders and bugs? Great for travel too!
More than Tic Tac Toe: As I was playing around with this set, I also came to think about another game to play similar to horseshoes.  Bounce the bottle cap on the table and try to get it on one of the squares. **Any of you that thought of “quarters” get back on track.  This is a family game! ** Get two points for getting it to touch the center square or one point on any of the other squares.  Be creative and come up with other games to play with the pieces available. Make sure to include instructions for the recipient!
Stamps:   Morning Cup
Papers:  Very Vanilla 
Ink: Jet Black Stazon, Rose Red, Baja Breeze, River Rock
Accessories: Linen Thread, Bottle Caps with Self-Adhesive Covers, Springtime Vintage Designer Fabric, Muslin 
Tools: 1” Circle Punch, 1/16” Handheld Punch, Blender Pens, Snail Adhesive, Sewing Machine
Techniques Used:  Water Coloring

Enjoy!

Need Stampin' UP! Supples?  Contact me today!


Sale-a-bration is underway!  Order your Stampin’ UP! products now and earn free products.  Call or email me now with any questions or to place your order.

Thursday, February 10, 2011

Stamping on Wood items

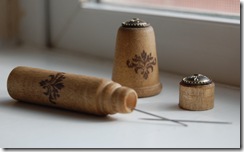
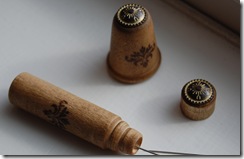
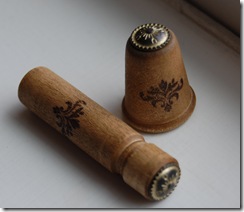
Have you ever tried stamping on wood? I’ve been playing around with some Matching Thimble and Needle Casefun items that I acquired a week or so ago.  These cute little wooden sewing items (Needle Case and Thimble) are usable and great items for hand sewing or a great little gift for that sewer, quilter or crafter that you know!  They remind me of something I would find when I would be picking through my grandmother’s sewing box. As I do sew, I think I may be keeping these fun items for myself!

I must tell you, if you have never stamped on anything curved, it is a tricky endeavor, so make sure you practice first.  Try using some non-permanent adhesive and some copy paper attached to your item.  That way you can practice all you want before you stamp!  When working with wooden items you may want to do a little fine sanding before you begin.  If you decide to sand, take a wet cloth and wipe away any wood dust before you begin your stamping and allow to dry if needed before stamping.

Thimble and Needle Case Top View Open

When I received these items they were natural wood so I did a little sponging to give it a more aged look with Crumb Cake and then I stamped in Chocolate Chip. I really like how the brads look on top of the items!  Those cute little antique brads (117273) were the perfect add on!  UPDATE – To attach the brads to the wood pieces, I cut off the prongs on the brads and folded the little pieces I couldn’t get off to the center. I made sure that the prongs were as flat as possible so that it was flush against the wood top.  I suggest using a “super glue” type of adhesive to attach them to the tops of the needle case and to the thimble if you plan to use them versus the Tombow multipurpose adhesive if using for decor purposes only.

Thimble and Needle Case ClosedIf you plan on using these items, I really suggest spraying with a clear acrylic spray.  It’ll keep the oils from your hands from discoloring the items and protecting those beautiful stamped images.


Stamps:   Tiny Tags
Papers:  None
Ink: Crumb Cake, Chocolate Chip
Accessories: Antique Brads 
Tools: Craft and Paper Scissors, Sponge 
Techniques Used:  Sponging

Enjoy!

Need ink? Visit my online store!


Sale-a-bration is underway!  Order your Stampin’ UP! products now and earn free products.  Call or email me now with any questions or to place your order.

Wednesday, February 9, 2011

Card Making Inspiration by Sketch Design

It’s another cold and icy day here today, and another “snow Butterfly Here For You Close Up day”.  Ten years of Chicago winters and not one snow day and we’ve had 5 here already…Wow!  Welcome to Dallas winters…I know that Noah is super-duper happy! He’s been all smiles today. 

I thought I would try and get a quick card made this morning…this is another Link to Splitcoast Sketch ChallengeSplitcoaststampers challenge.  This one is all about using a predetermined sketch to design a card.  Can you see all these elements in the card I created ?  This is a very simple idea that helps you begin your card/scrapbook page or 3D item by giving you a design to follow. You just have to pick out your Butterfly Here For You stamps and paper and ink.  Easy right?  The next time you create a card, give this a try. 

Some details I’d like to share with you. 

*My card base is an unconventional size.  It is 4-1/4” x 5”.  Did I do that on purpose?  Yes.  I chose to have some of my card elements come off the card rather than be directly on the card base making the finished card size 4-1/4” x 5-1/2”. Also, It is nice when you have a strip of paper sitting in your scrap draw that isn’t quite the perfect size for your card. Right?

*Also the #3 strip uses (3) Two Tags Bigz Die with the sides cut off to narrow it up a bit.   

*Finally, I dipped the antennae in the Champagne Mist Shimmer Paint for just a touch of sparkle. This absolutely doesn’t show in the photos.

Stamps:   Occasional Quotes
Papers:  Crumb Cake, Very Vanilla, soft Suede, Baja Breeze, Elegant Soiree Designer Paper
Ink: Basic Gray
Accessories: Mini Glue Dots, Antique Brads, Paper Snips 
Tools: Two Tags Bigz Die, Big Shot, Beautiful Butterflies Bigz Die, Paper Piercer, Elegant Soiree Designer Paper 
Techniques Used:  n/a

Enjoy!

Need Stampin' UP! Supplies? Visit my online store?

Sale-a-bration is still going on!  Order your Stampin’ UP! products now and earn free products.  Call or email me now with any questions or to place your order.

Tuesday, February 8, 2011

Card Making and Photography

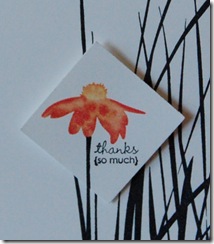
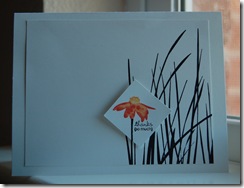
When you sit down to Image Close Up make a card does it take you forever?  Do you have all your stamps out and all kinds of paper and you keep thinking about it?  Well, today was not one of those days for me! I saw this fun challenge over at Splitcoaststampers to create a Clean and Simple (CAS) card with these colors…(Whisper White, Poppy Parade, Peach Parfait and Daffodil Delight), and then I was done.

Full Card Okay, so I thought about it, grabbed my paper and supplies in about 5 minutes and then put this quick and simple card together in about 2 minutes.  It took me more time to photograph it then to put it together.  The sun was too bright….okay, I know all of you that are living in the middle of a snowy heap and gray skies are not happy with me saying that, but it’s true.  Have you ever had a problem taking a photo in bright direct sunlight.  It washes a lot of the color away…oh the trials and tribulations of living in a warmer climate, I guess, LOL! 

Project "Toucher" Then, this guy couldn’t keep his nose away from the card while I was trying to photograph it.  I think it looks like he is saying “Who Me?”  Do you have a pet that must “touch” your pieces of art when you are busy photographing them?  If I look back at some of my old photos, I’m sure I could find a couple puppy noses.

Stamps:   Inspired by Nature, Tiny Tags
Papers:  Whisper White
Ink: Jet Black Stazon 
Accessories: Dimensionals
Tools: Poppy Parade, Daffodil Delight, Peach Parfait Stampin’ Write Markers, 1-1/4” Square Punch 
Techniques Used:  Spotlight

I hope you’re having as good a day stamping as I’m having, but a better day taking photos!

I’ll try to get some photos of what I’ve been spending a bunch of time on later in the week! If you’re interested in stamping on wooden items then make sure you check back!

Enjoy!

Need Stampin' UP! products?  Shop my online store.

Sale-a-bration is still going on!  Order your Stampin’ UP! products now and earn free products.  Call or email me now with any questions or to place your order.

Friday, February 4, 2011

Half Box Gift Packaging How To

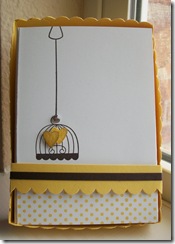
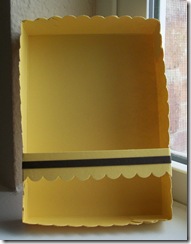
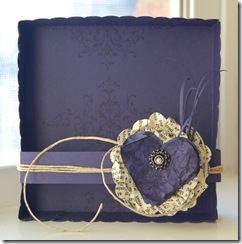
Making custom boxes is a very eCaptured Hearts Gift Packageasy project if you know how to do it.  This little half box is so simple because you don’t have to make a top for it.  A simple belly band or a ribbon wrapped around the box is a simple way to keep the precious creations in the box.  The Nested Hearts half box I made held 4-1/4” x 4-1/4” cards and the dimensions are shown below.  This Captured Hearts half box will hold 5” x 3-1/2” cards.

The box I’ll be showing you today holds eight of the Captured Hearts cards with eight envelopes.  The box was inspired by the box on page 10 of the current 2010-2011 Stampin’ UP! catalog.

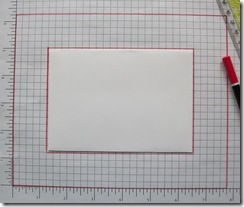
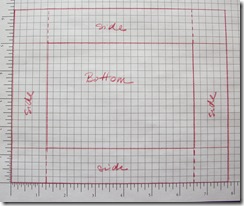
I create templates using Stampin’ Up!’s grid paper (102787).  It is a wonderful tool when creating templates and then easily stored for the next time you need it!  You’ll be creating this half box template to fit the size of your envelope as it is a bit bigger than your card.  So place your envelope on your grid paper and draw a rectangle around it. I wanted the sides to Using Grid Paper to create a templatebe 1-1/4” so that after scalloping the edge I had a 1” side.  I made sure their was a 1-1/4” band on all sides around the envelope.  Those 1/4” squares make it easy to measure.  I mark directly on the paper and then have a template for next time. After marking your envelope and the sides, you have the dimensions for your  cardstock.  6-1/4” x 7-3/4”.   Click on the photo to see a close up with the ruler. 

Captured Hearts Half Box Template Cut your cardstock to the dimensions and score all sides 1-1/4”.  If you want to scallop the edges do that before folding on all the score lines.  Next, fold along all scored lines and cut dashed lines as shown  in photo. Use Sticky Strip to adhere box together.

Captured Hearts Half Box Gift PackagingIf you scalloped the edges, they might not line up perfectly when you put the box together.  Use your sharp Paper Snips to cut around the scallops to “clean” them up.

Nested Hearts Box (for 4-1/4” x  4-1/4” cards. 4-3/8” x 4-3/8” envelopes) Cut a piece of cardstock 7-7/8” x 7-7/8”.  Score all sides at 1-1/4”. Follow directions above.Nested Hearts Half Box Gift Packaging

Personal tip:  I suggest creating all your cards and envelopes first.  The height of your box sides will be determined by how dimensional your cards tend to be.  For example.  I was only able to place 3 cards with matching envelopes in the Nested Hearts box because both the cards and envelopes contained dimensional elements, whereas, the Captured Hearts box contained eight cards and envelopes because the cards and envelopes contained little to no dimensional elements.

Enjoy!

Visit My Online Store for your Stampin' Up! needs!

Thursday, February 3, 2011

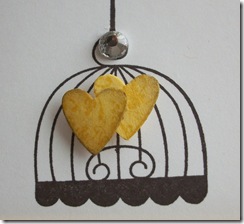
Captured Hearts

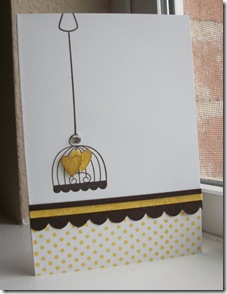
This card was inspired by a Captured Hearts challenge over at Splitcoaststampers to use hearts.  This quick and simple card uses the Note Cards and envelopes (107311) that are found on page 171 of the current Stampin’ UP! catalog. 

I thought this card was the perfect card to create for the men in my life…my husband, father, brother-in-law, and father-in-law.  I could make lots of them and then they would have cards to give to me…okay OR their wives for birthdays, Valentine’s Day, Mother’s Day, “that was a great thing you did for me Captured Hearts Close Up Day”, “I thought about you all day today day”, “I’m sorry I’m a dope sometimes day”, or anytime a man needs a card to give to his wife day (you all know this list could go on and on)!  I know I would be happy to receive one of these for any one of those days…and of course a handwritten love note from David always makes my day.

I chose Daffodil Delight for my card today, but any color would do.  I enjoy using all my colors so although Cherry Cobbler and Real Red were the first colors I was drawn to, I decided to spice it up with the color of parakeets.

Stamps:   Aviary, Dot, Dot, Dot, Clearly for You
Papers:  Whisper White, Early Espresso, Daffodil Delight
Ink: Early Espresso, Daffodil Delight, Crumb Cake 
Accessories: Jewels, Dimensionals
Tools: Heart to Heart Extra Large Punch, Scallop Edge Punch, Sponge, Stamp-a-ma-jig 
Techniques Used:  Two Step Stamping, Sponging

Tomorrow, I’ll post to show you how to create a template for the half box shown in my Nested Hearts Gift Set post, for this Captured Hearts set of cards.

Enjoy!

Visit My Online Store